
Nếu bạn đang gặp khó khăn trong việc giao tiếp Serial dùng C# với Arduino, thì đây bài viết này là dành cho bạn !!!
Dưới đây là hướng dẫn cách giao tiếp qua cổng Serial từ Arduino tới PC vào giao tiếp giữa PC và Arduino sử dụng C#.
Step 1: Chuẩn bị
Software:
Hardware:
- Arduino Leonardo
- PC
Step 2: Giao tiếp từ Arduino tới PC
Ở đây mình sẽ thực hiện gửi “1” từ Arduino và PC sẽ nhận được “1”:
1 – Arduino: gửi ‘1’ (Bạn có thể gửi bất kỳ data nào mà bạn muốn)
Code cho Arduino:
void setup() {
Serial.begin(9600);
}
void loop() {
Serial.print('1');
delay(200);
}
2 – PC: nhận “1”
Bây giờ, trên PC thì bạn tạo một new Console application. Sử dụng Console này để nhận data.
Mình sẽ để cách dễ nhất để tạo Console này!
C# code:
using System;
using System.IO.Ports;
using System.Threading;
namespace ConsoleApp1
{
    class Program
    {
        static SerialPort _serialPort;
        public static void Main()

        {
            _serialPort = new SerialPort();
            _serialPort.PortName = "COM4";//Set your board COM
            _serialPort.BaudRate = 9600;
            _serialPort.Open();
            while (true)
            {
                string a = _serialPort.ReadExisting();
                Console.WriteLine(a);
                Thread.Sleep(200);
            }
        }
    }
}
Nào, bây giờ bấm START, và bạn sẽ thấy kết quả giống dưới đây! Đã nhận data từ Arduino.

Step 3: Giao tiếp từ PC tới Arduino
Bước này thì mình sẽ gửi “0” hoặc “1” từ PC và Arduino sẽ nhận “0” hoặc “1” (tương ứng với “0” – tắt đèn ,“1” – mở đèn).
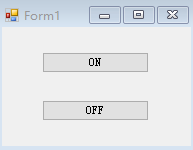
Trên PC bạn tạo một mới một Winforms app và tạo 2 button. Giống hình mình ở dưới đây.
C# Code:(Winforms)
using System;
using System.Windows.Forms;
using System.IO.Ports;
namespace lightcontrol
{
    public partial class Form1 : Form
   {
        SerialPort port;
        public Form1()
        {
            InitializeComponent();
            this.FormClosed += new FormClosedEventHandler(Form1_FormClosed);
            if (port==null)
            {
               port = new SerialPort("COM7", 9600);//Set your board COM
                port.Open();
            }
        }
        void Form1_FormClosed(object sender,FormClosedEventArgs e)
        {
            if(port !=null &&port.IsOpen)
            {
                port.Close();
            }
        }
        private void button1_Click(object sender, EventArgs e)
        {
            PortWrite("1");
        }
        private void button2_Click(object sender, EventArgs e)
        {
            PortWrite("0");

        }
        private void PortWrite(string message)
        {
            port.Write(message);
        }
    }
}
Bây giờ code cho Arduino
const int LedPin = 13;
int ledState = 0;

void setup()
{
  pinMode(LedPin, OUTPUT);
  Serial.begin(9600);
}

void loop()
{
    char receiveVal;
    if(Serial.available() > 0)
    {
        receiveVal = Serial.read();
       if(receiveVal == '1')
          ledState = 1;
       else
          ledState = 0;
    }

    digitalWrite(LedPin, ledState);
    delay(50);
}
Tới đây, nếu bạn bấm nút “ON”, bạn sẽ thấy LED pin13 sáng.
Có nhiều cách khác để làm theo, bạn tham khảo thử hướng dẫn khác ở đây nhé!
Step 4: Tổng kết
Trên đây là cách đơn giản nhất để thực hiện giao tiếp giữa PC và Arduino. Hầu hết các dự án cần Arduino để gửi data tới PC và sử dụng để phân tích data hoặc làm những thứ khác. Vì vậy giao tiếp này khá là cần thiết và quan trọng. Hy vọng bài viết này sẽ giúp ích cho bạn!