Preparations:
- VirtualBox application. In this tutorial, I use version 6.1.22 for Windows (VirtualBox-6.1.22-144080-Win.exe) – Download VirtualBox
- An Ubuntu ISO file. I chose Ubuntu 20.04.6 LTS (Focal Fossa). – Download the released image from Ubuntu site.
Download details:
Desktop image
The desktop image allows you to try Ubuntu without changing your computer at all, and at your option to install it permanently later. This type of image is what most people will want to use. You will need at least 1024MiB of RAM to install from this image.
https://releases.ubuntu.com/20.04/ubuntu-20.04.6-desktop-amd64.iso
Step 1: Create a new Virtual Machine (VM)
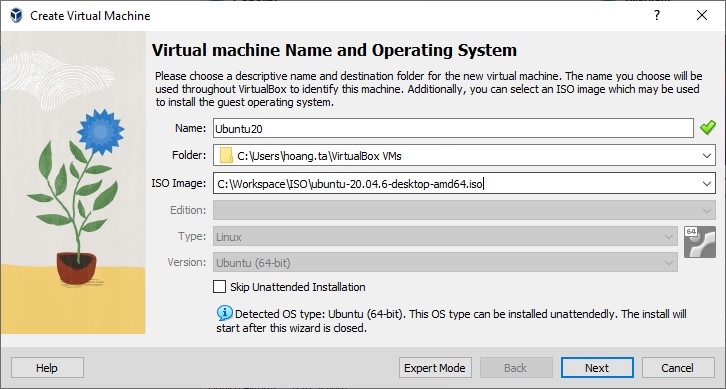
Fill in some information about your virtual machine (Name, Folder, ISO Image). Folder is the directory to store your VM. By default, it is a created folder by VirtualBox in your user directory.
Check the Skip Unattended Installation box if you would like to install the OS manually. VirturalBox will let you create and format partitions, decide which software will be installed, and give sudo right to your user account.
I don’t check this box and let VirturalBox help me to install OS. In this case, my user account will not have sudo right, however it can be set later.
Click Next button.
Set username, password and hostname for your virtual machine.
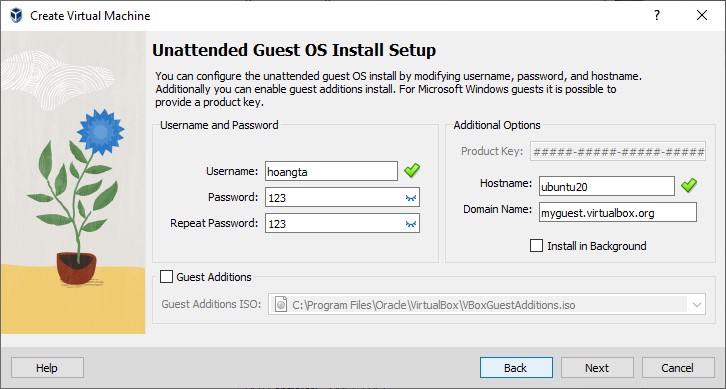
Click Next button to start the installation.
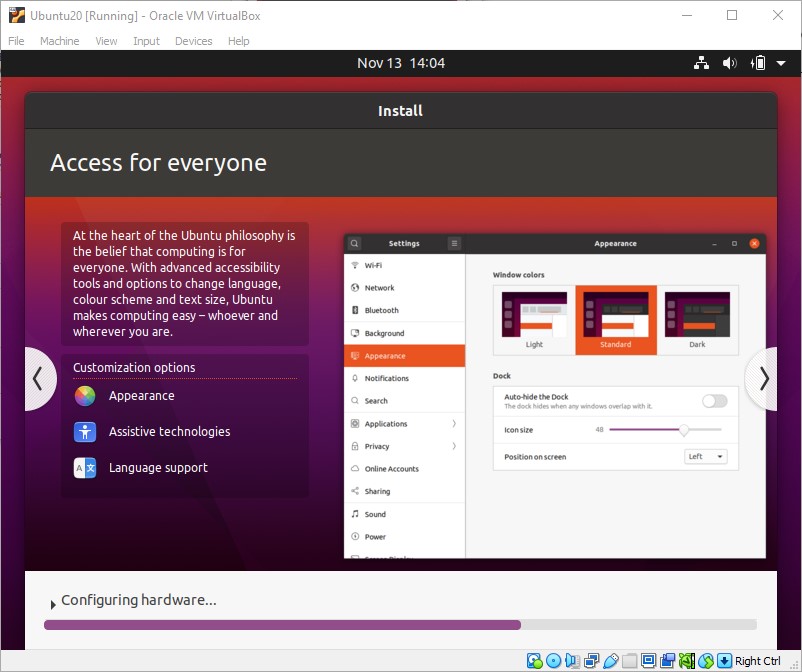
Wait for Ubuntu installation is complete. It usually will take 20-30 minutes.
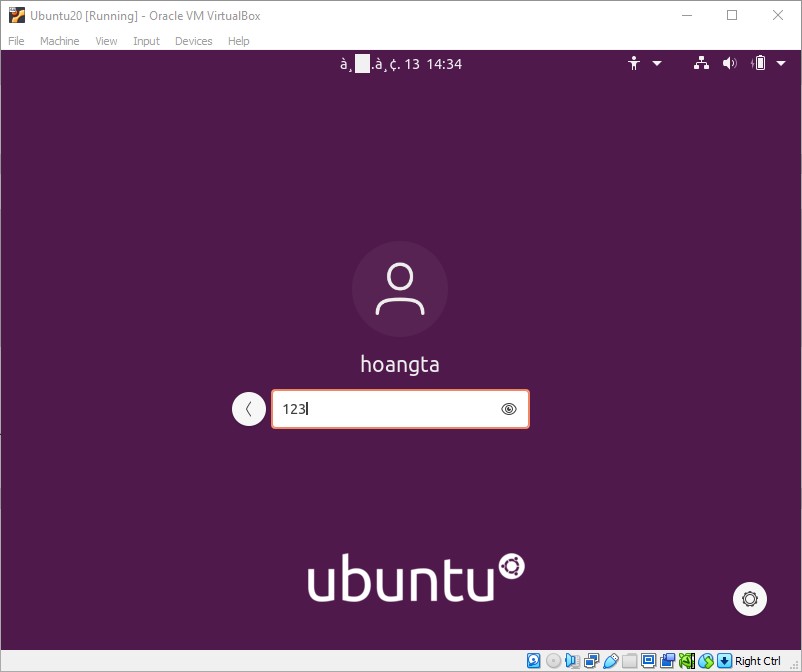
After the installation, login with your created username.
Step 2: Configure communication between host and guest machines
This step will help you easily transfer data between Host machines (PC/Laptop) and Guest machines (Virtual Machines). It is convenient when you would like to copy and paste text from host to guest or from guest to host, setup Shared Clipboard. You can quickly transfer files or folders between host and guest machines by mouse, setup Drag and Drop. To share folders of host machine for guest machine, setup Shared Folders.
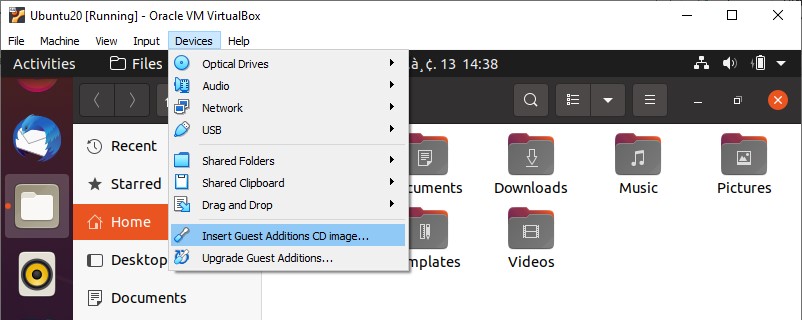
Install sharing functions to your guest machine by using Insert Guest Additions CD image… in Devices menu
Go to Device > Insert Guest Additions CD image…
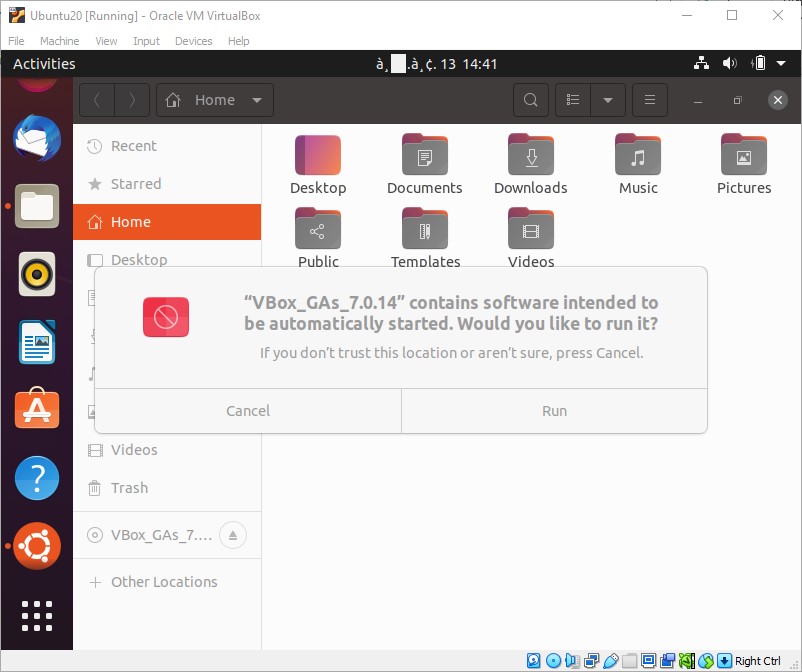
Click Run button.
The CD image is loaded as below.
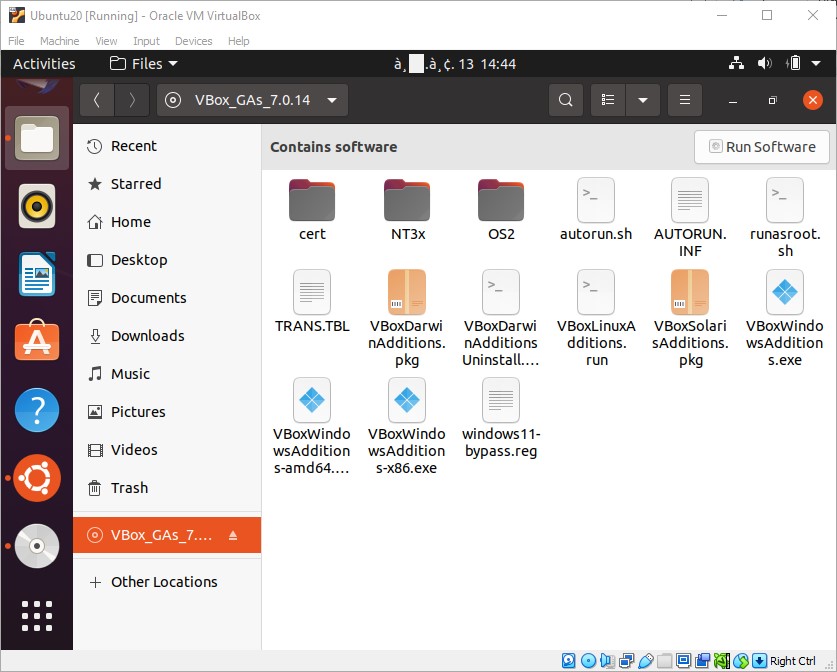
Double click on autorun.sh or/and VBoxLinuxAdditions.run scrip files to install sharing-to-host-machine functions.
After that, restart your Ubuntu VM.
Now, you can enable Shared Folders, Shared Clipboard, Drag and Drop functions for your virtual machine.
Step 3: Enable Shared Folders, Shared Clipboard, Drag and Drop
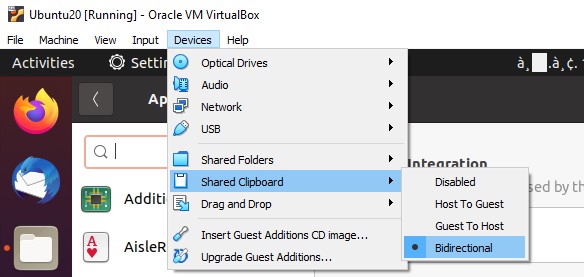
1. Setup Shared Clipboard
Devices > Shared Clipboard > Bidirectional
2. Setup Drag and Drop
Devices > Drag and Drop > Bidirectional
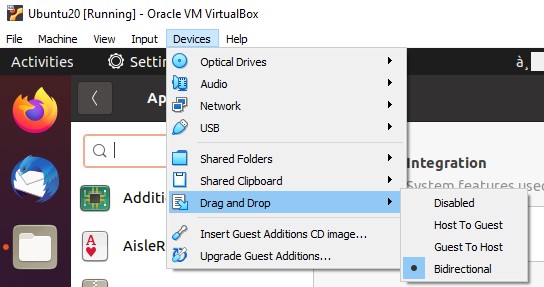
3. Setup Shared Folders
Devices > Shared Folders > Bidirectional
Open settings of your virtual machine. Create a folder on host machine (Windows) to share with virtual machine (Ubuntu).
For example: I share a source-code folder and a data folder of host to virtual machine.
- Shared folder 1 (data): C:\VM\shared_fd
- Shared folder 2 (code): C:\Workspace\github
Add shared folders to your virtual machine (Ubuntu). Remember to enable Auto-mount and Make Permanent selection boxes.
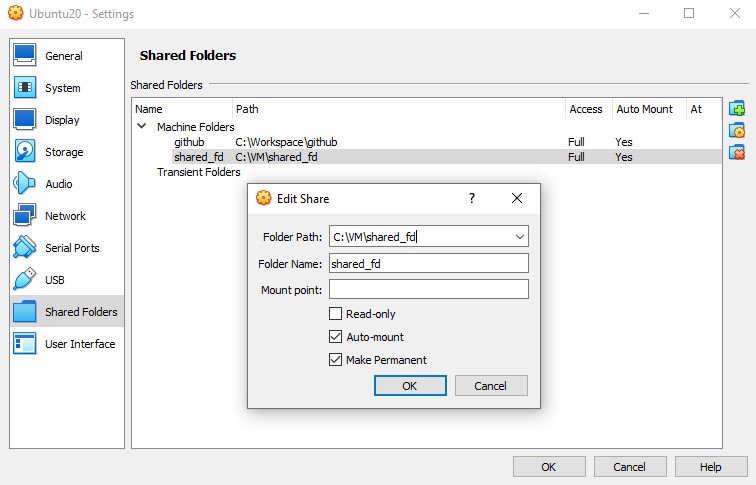
Click OK button. The shared folders will be appeared on Ubuntu in /media/sf_<host shared folder> directory.
You will need to add your username to vboxsf user group to get access right for shared folders.
Add access rights to your shared folders
To access shared folders, you need to add your account to vboxsf group. Type and run below command.
$ sudo adduser $USER vboxsf
Done! Now you can copy and paste by sharing clipboard, drag and drop files or folders and shared folders between between your host and guest machine.